

Testing Shopify payment gateways ensures your checkout process works smoothly, avoiding errors that frustrate customers and lead to lost sales. Here's how you can test your payment setup effectively:
- Enable Test Mode: Use Shopify Payments' built-in test mode or configure third-party gateways like PayPal or Stripe for sandbox testing.
- Bogus Gateway: Activate Shopify's Bogus Gateway to simulate transactions (e.g., approvals, declines, or failures).
- Test Credit Cards: Use Shopify's dummy card numbers to simulate various payment scenarios.
- Review Test Orders: Check order details, payment statuses, and system responses in your Shopify admin.
- Third-Party Gateways: Activate test modes or sandbox environments directly in your external provider's dashboard.
- Fix Errors: Address issues like incorrect credentials, missing settings, or test mode misconfigurations.
Key Takeaway: Testing prevents checkout issues, reduces cart abandonment (which can reach 70%), and ensures your store is ready for real transactions. Always disable test mode after testing to resume normal operations.
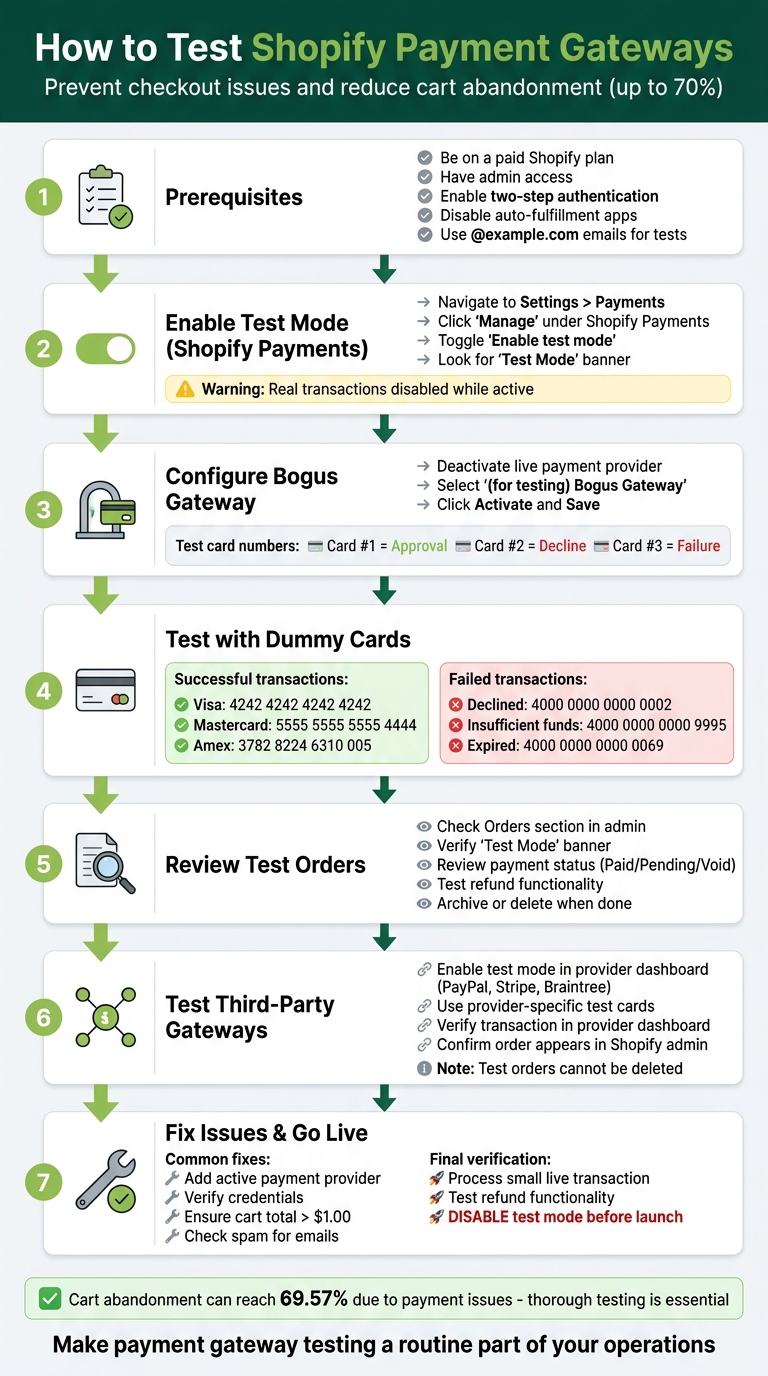
7-Step Process to Test Shopify Payment Gateways
How To Do a Test Order on Shopify (Test Payments Mode)

sbb-itb-8b1a57a
Step 1: What You Need Before Testing Payment Gateways
Before diving into testing payment gateways, make sure your Shopify store is set up correctly. First, you need to be on a paid Shopify plan - testing gateways isn't possible during the trial period. You'll also need admin access to navigate to Settings > Payments in your Shopify dashboard. If you're planning to test Shopify Payments, enabling two-step authentication on your account is a must for added security.
Complete the initial setup of your payment gateway before activating test mode. For development stores, keep in mind that only simulated transactions are allowed - real transaction testing isn’t supported. If you’re testing B2B orders, ensure you have the necessary permissions to activate customer accounts and create test company profiles.
To avoid unexpected charges, disable any apps that automatically fulfill orders, as these could generate shipping label fees during testing. Additionally, use email addresses ending in @example.com for test orders to keep your inbox uncluttered. These steps will help ensure everything runs smoothly as you begin testing.
Know Your Shopify Payment Options
Shopify provides three main types of payment methods: Shopify Payments, third-party gateways, and manual payment methods. Each has its own testing process:
- Shopify Payments: This is Shopify’s built-in gateway, which includes a "Test Mode" feature that you can enable directly in your admin panel.
- Third-party gateways: Options like PayPal, Stripe, or Braintree may offer their own test mode, either configured within Shopify or through a sandbox environment on their platform.
- Manual payment methods: These include cash on delivery and bank transfers. Unlike the other options, these don’t support simulated testing. To test these, you’d need to place a real order and then cancel or refund it.
Knowing how each payment method operates is crucial because testing procedures differ. For example, Shopify’s Bogus Gateway (a simulated payment provider) doesn’t work with Shopify POS or subscription products, but Shopify Payments’ test mode does. Understanding these distinctions will help you avoid testing with incompatible methods.
Check If Your Gateway Supports Test Mode
Once you’ve covered the prerequisites, the next step is confirming whether your chosen gateway supports test mode. Head to Settings > Payments in your Shopify admin. For Shopify Payments, click Manage in your Payments settings to find the Test Mode option. If you’re using a third-party gateway, look for an "Enable test mode" checkbox in its settings on the same Payments page.
If the option isn’t visible for your third-party gateway, check the provider’s documentation - they might offer a separate developer sandbox for testing. Keep in mind that Shopify Payments isn’t available in every country. For example, merchants in France are directed to use the Bogus Gateway instead of Shopify Payments’ test mode.
A key point to remember: activating test mode on any gateway disables real customer transactions. To avoid disruptions, test on a development store or during off-hours. Always switch back to live mode once testing is complete to resume normal operations.
Step 2: Turn On Test Mode for Shopify Payments
Navigate to Shopify Payments Settings
To get started, head to your Shopify Payments Settings. If you're using a desktop, go to Settings > Payments and click Manage under Shopify Payments. On mobile, open the menu, tap Settings > Payments, and then select Manage.
Once you're on the Payments page, click Manage under Shopify Payments to access the settings. Before you can enable test mode, ensure that your business and bank account information is fully set up. Without completing this initial setup, the option to activate test mode won't appear.
Enable Test Mode
Look for the Test Mode section in your settings. Toggle the option to "Enable test mode" and click Save. Once activated, a "Test Mode" banner will appear on any test orders you create, making it clear that no actual payments are being processed.
While test mode is active, real credit card transactions are disabled, and local payment methods like Sofort and iDEAL will not appear. Because of this, test mode should never be turned on in a live store with active customer traffic, as it will block real purchases. After you're done testing, make sure to disable test mode so your store can resume processing actual transactions.
Note: Test mode does not work with Shopify POS card readers, Shop Pay Installments, or PayPal Wallet. If you need to test these features, consider using alternative methods or a development environment.
Next, move on to configuring the Bogus Gateway to test transactions further.
Step 3: Configure the Bogus Gateway for Testing
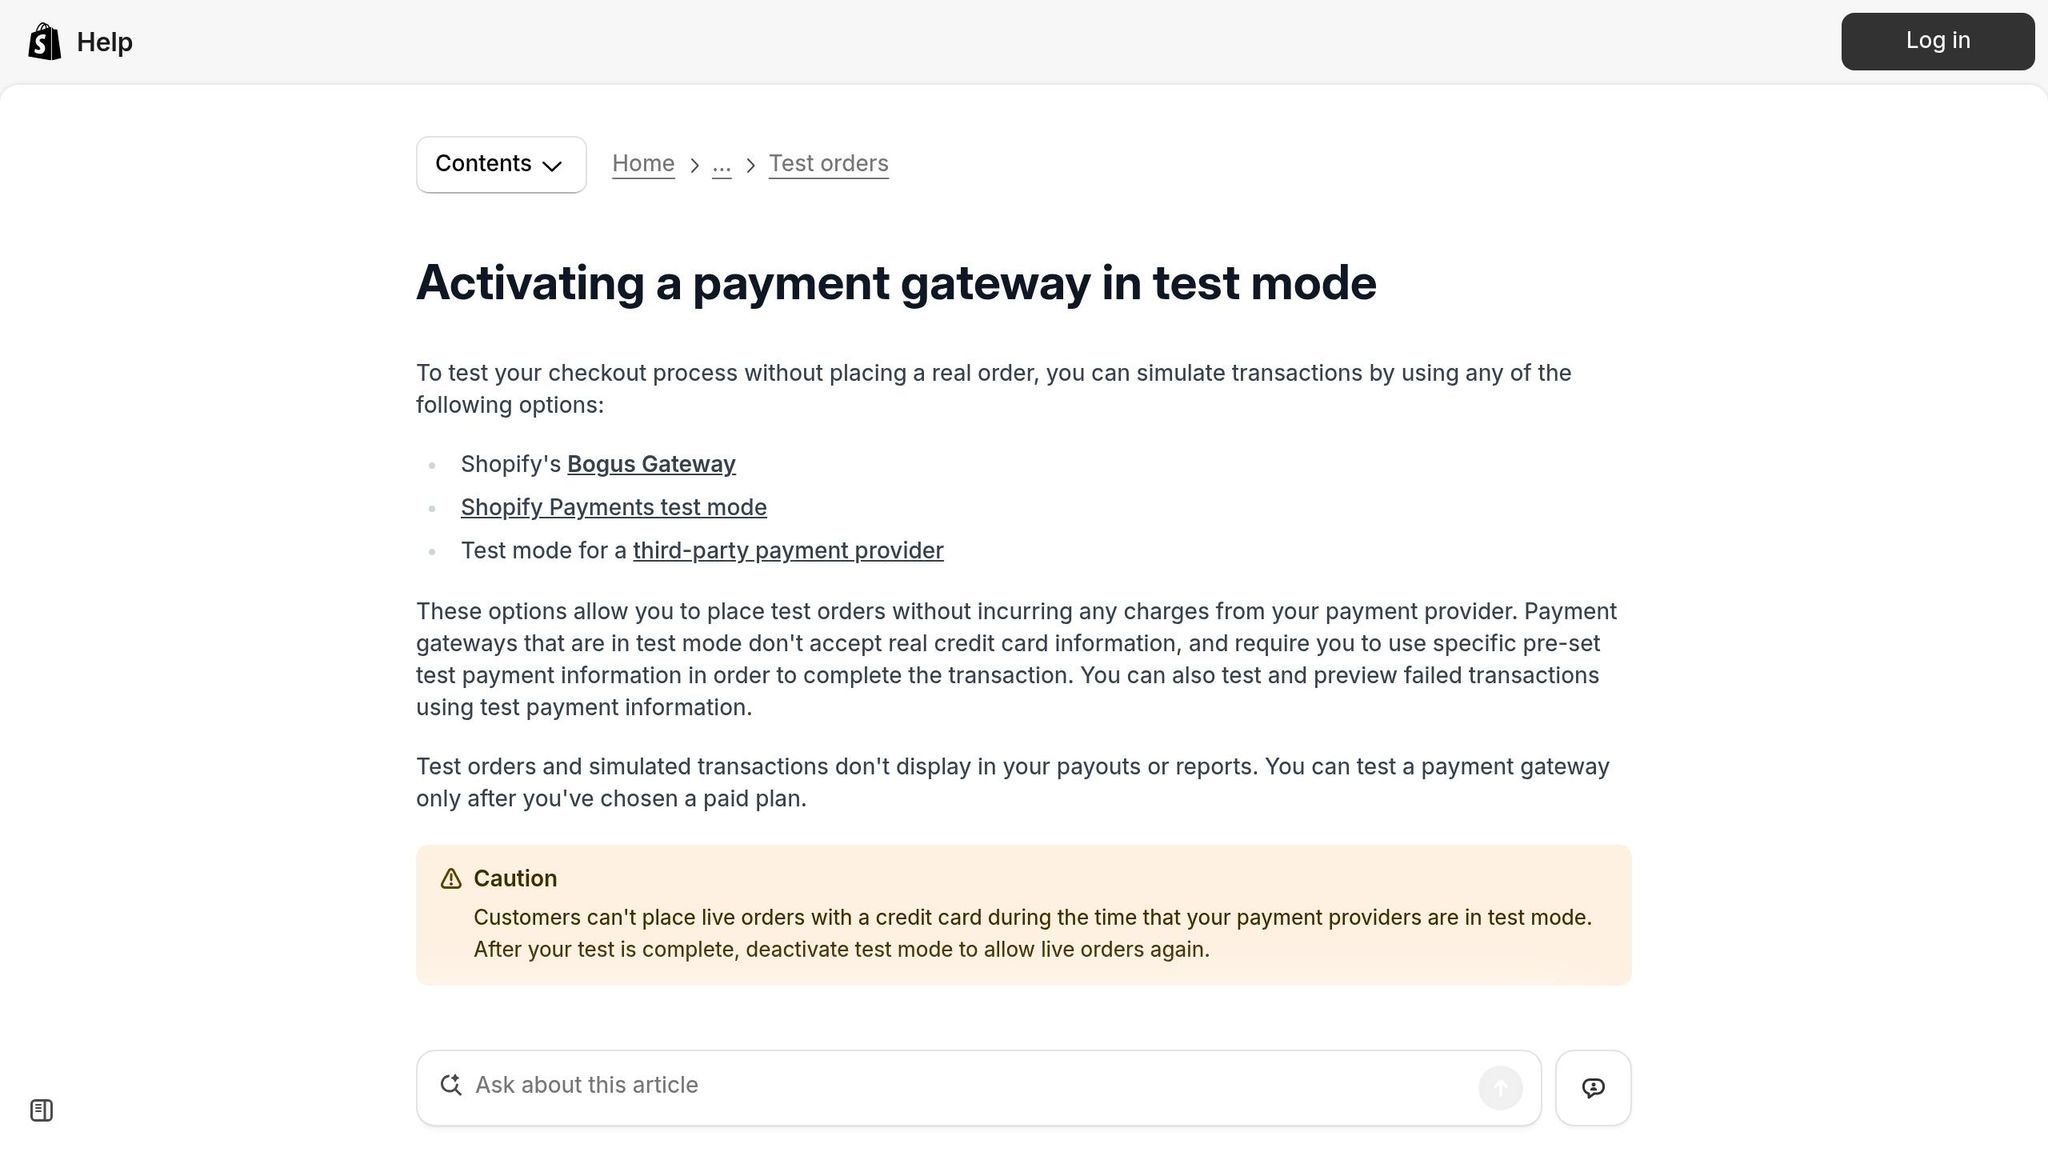
Activate the Bogus Gateway
Once test mode is enabled, it's time to activate the Bogus Gateway to simulate transactions. This tool, built into Shopify, allows you to test successful, declined, or failed transactions without needing actual credit card details. Before you proceed, make sure to deactivate any active credit card payment providers.
Here’s how to deactivate your payment provider:
- For Shopify Payments: Go to Settings > Payments, click Manage under Shopify Payments, then choose Manage payment methods. Select "Switch to a third-party provider" and confirm.
- For third-party gateways: Click Manage next to the provider and select Deactivate.
After deactivating your live payment provider, scroll to the Shopify Payments section. Choose 'See all other providers' (or 'Choose a provider' if that option appears). Locate (for testing) Bogus Gateway from the list, select it, and click Activate (for testing) Bogus Gateway. Don’t forget to hit Save to finalize the setup.
Note: While the Bogus Gateway is active, customers won’t be able to place real orders. Additionally, this gateway isn’t compatible with Shopify POS or subscription products. Once testing is complete, reactivate your live payment provider to resume normal transactions.
Create Test Transactions
With the Bogus Gateway active, you can now generate test orders to simulate different transaction scenarios. Start by visiting your online store as if you were a customer. Add items to your cart, ensuring the total exceeds $1.00 USD - transactions below this amount won’t process.
At checkout, you’ll notice a yellow "B" icon indicating the Bogus Gateway is in use. To simulate specific outcomes, use the following details:
- Name on Card: Enter Bogus Gateway.
- CVV: Use any three-digit number, like 111.
- Expiration Date: Any future date will work.
- Card Number: Input 1 for approval, 2 for a declined transaction, or 3 for a gateway failure.
Complete the purchase and check the Orders section in your Shopify admin to confirm the test order has been recorded. These test orders won’t appear in your payouts or financial reports, and you can delete them directly from your admin. For testing purposes, disable any auto-fulfillment apps and use @example.com email addresses, as mentioned in Step 1.
Step 4: Process Test Transactions with Dummy Credit Cards
Use Shopify's Test Credit Card Numbers
When Shopify Payments test mode is enabled, you can simulate transactions using dummy credit card numbers. These test cards allow you to check that your checkout process works correctly without handling actual payments. Make sure test mode is activated in your Shopify Payments settings before proceeding.
To perform a test transaction, enter a cardholder name with at least two words (e.g., "John Smith"), any future expiration date, and a 3-digit security code (or 4 digits for American Express). Ensure the test transaction amount is over $1.00 USD to complete the process successfully.
| Card Type | Test Card Number |
|---|---|
| Visa | 4242 4242 4242 4242 |
| Mastercard | 5555 5555 5555 4444 |
| American Express | 3782 8224 6310 005 |
| Discover | 6011 1111 1111 1117 |
| Diners Club | 3056 9309 0259 04 |
| JCB | 3566 0020 2036 0505 |
Test Different Transaction Outcomes
To ensure your checkout handles errors properly, test both successful and failed transactions. Shopify provides specific card numbers to simulate various failure scenarios, so you can verify that customers receive clear error messages when issues arise.
| Failed Transaction Type | Test Card Number |
|---|---|
| Generic card declined | 4000 0000 0000 0002 |
| Insufficient funds | 4000 0000 0000 9995 |
| Lost card | 4000 0000 0000 9987 |
| Stolen card | 4000 0000 0000 9979 |
| Expired card | 4000 0000 0000 0069 |
| Incorrect CVC | 4000 0000 0000 0127 |
| Processing error | 4000 0000 0000 0119 |
You can also manually trigger failures by entering 13 as the expiration month, a past year (e.g., 2000), or a 2-digit security code. After completing each test transaction, check the Orders section in your Shopify admin to confirm the order status is accurate. Keep in mind that test orders won't appear in your payouts or financial reports, and you can delete them anytime to maintain a clean order history. Always review these test orders in your Shopify admin to ensure everything is functioning as expected.
Step 5: Review Test Orders in Your Shopify Admin
Find Your Test Orders
Head over to the Orders section in your Shopify admin to locate your test orders. These will show up alongside real orders, complete with details like the customer name, order number, total amount, and date.
When you open a test order, look for the test mode banner at the top of the page. This banner confirms that no actual funds were captured during the transaction, reassuring you that it's a simulated order.
Check Order Details
Once you've found your test orders, it's time to dig into the details. Start by reviewing the order information - check the payment status (it should say Paid for successful transactions or Pending/Void for failed ones), verify the total amount, and ensure the customer details match what you entered.
The order timeline is especially useful here. It shows every interaction between Shopify and your payment gateway, including authorization keys and messages. Double-check that the order totals are accurate by confirming product prices, shipping rates, and tax calculations based on the shipping address you provided during checkout. Also, verify that customer information, like the name, email (e.g., one ending in @example.com), and shipping address, is correct.
You can even go a step further by testing the entire order process. Try clicking the Refund button to see if the system handles returns properly. Add tracking information to test if shipping notification emails are sent as expected.
To keep your order history tidy, you can archive or delete test orders when you're done. Just go to Orders > More actions > Archive. Carefully reviewing these details ensures your live checkout process runs smoothly for real customers.
Step 6: Test Third-Party Payment Gateways
Turn On Test Mode for Third-Party Gateways
Testing third-party payment gateways involves a slightly different process compared to Shopify Payments. If you're using providers like Stripe, PayPal, or Braintree, you'll need to adjust your setup accordingly. Some providers, such as PayPal Payflow Pro or Braintree, allow you to toggle test mode directly in your Shopify admin. You can find this option under Settings > Payments. If available, simply enable test mode using the toggle.
For many other third-party gateways, Shopify doesn’t display a test mode option. Instead, you’ll need to log in to the provider’s dashboard to activate their sandbox or testing environment. Each gateway has its own setup process, so it’s essential to consult their documentation for guidance on enabling test mode and retrieving the specific test credit card numbers they provide (these are different from Shopify’s standard test cards).
Testing is crucial to ensure your payment system operates smoothly and provides a seamless experience for customers.
Run Transactions on Third-Party Gateways
Once test mode is enabled, you can start simulating transactions. Go to your storefront, add an item to your cart, and proceed to checkout. Use the test card numbers provided by your payment gateway (not Shopify’s test cards). Shopify marks these transactions with a "test: true" attribute, signaling that the transaction is simulated and recognized as a test by the gateway.
After completing the test checkout, visit your third-party provider’s dashboard (e.g., Stripe or PayPal) to confirm the transaction has been logged. This step ensures Shopify is properly communicating with the external gateway. You should also see the order listed in your Shopify admin under the Orders section. Keep in mind, though, that test orders processed through third-party gateways cannot be deleted, unlike those created with Shopify’s Bogus Gateway.
If a transaction fails, check the provider’s dashboard for error messages. Common issues might include mismatched address or postal code details, so double-check the information entered during testing.
Step 7: Fix Common Testing Problems
Resolve Test Mode Errors
Even with everything set up correctly, testing can sometimes trigger errors. One common issue is the "This store is currently unable to accept payments" message. This happens when your store lacks an active primary payment provider. To fix it, head to Settings > Payments and ensure you've added an active payment provider.
Another frequent problem comes from credential errors, which can disrupt connections with third-party gateways. Double-check your account credentials in Shopify's settings - remember, even a small typo can cause issues. Additionally, make sure test mode is activated on the payment provider's platform, not just in Shopify.
Don't overlook your cart total during tests. The test purchase must be over $1.00 USD (or your currency's equivalent) to process successfully. If confirmation emails aren't arriving, check your spam folder and consider resetting the default email template.
Finally, once testing is complete, deactivate test mode to avoid any confusion.
Confirm Proper Gateway Integration
After resolving any errors, it's time to confirm that everything works seamlessly. The best way to do this is by performing a small live transaction using a real credit card. This ensures the payment gateway is fully integrated with Shopify. Use a regular email address during this test to confirm that customer notifications are sent properly, and check that the order appears in your Shopify admin without any "Test Mode" banners.
Next, log in to your payment provider's dashboard - whether it's PayPal, Stripe, or another service - and verify that the transaction is marked as "Authorized" or "Captured." This confirms that Shopify is communicating correctly with the provider. Also, review the order timeline in Shopify to ensure there are no lingering test mode indicators.
To complete the test, issue a refund for the transaction. This will confirm that refunds process correctly and that the refund status syncs with your payment provider. Customers should also receive a notification about the refund. To keep costs low, process the refund immediately, but note that some providers may not reimburse the original transaction fees.
If you're using manual payment capture, check that the "Capture Payment" button is visible and works as expected. Payment-related glitches can lead to high cart abandonment rates - up to 69.57% - so thorough testing is critical.
Make sure live transactions process smoothly before resuming regular operations.
Conclusion
Testing your payment gateways is essential for protecting your revenue and earning customer trust. A thorough review of your checkout process helps you catch problems before they lead to lost sales. With cart abandonment rates reaching as high as 69.57% due to technical issues and payment glitches, ensuring a smooth checkout experience is non-negotiable - nearly seven out of ten customers might leave if something goes wrong.
"Testing your payment gateway in Shopify is not merely a checklist step; it is a vital part of your store's readiness." - Tevello
Beyond fixing technical bugs, testing impacts the broader functionality of your store. It ensures that everything works as it should, from inventory management and tax calculations to shipping estimates and automated emails. This attention to detail also guarantees that customers see clear, helpful error messages when payments fail, instead of generic ones that might frustrate them and drive them away.
Steps like enabling test mode and double-checking third-party integrations not only create a secure, efficient checkout process but also provide valuable insights into the customer experience. Addressing any friction in this process can turn occasional shoppers into loyal, repeat customers.
"Understanding the customer experience can help you identify and address issues that may lead to cart abandonment. Always remember, satisfied customers are more likely to become repeat customers." - Ollie, Shopify Community
Make payment gateway testing a routine part of your operations, especially when launching your store or updating payment settings. Regular testing ensures a seamless checkout experience that keeps customers happy, builds trust, and encourages them to return.
FAQs
Should I test payments on a live store or a development store?
When setting up your Shopify store, it's smart to test payments in a development store to prevent any disruptions for real customers or unexpected charges. Shopify provides helpful tools like test modes for Shopify Payments and the Bogus Gateway, which allow you to simulate transactions safely. Testing directly on a live store can lead to unintended charges or messy data, so stick to a controlled environment to ensure your checkout process works smoothly before launching.
Why does my test checkout say the store can’t accept payments?
If you’re seeing this message, it likely means the payment gateway isn’t set up correctly in test mode or the test payment details entered are incorrect. Make sure test mode is enabled for your payment provider and use only the approved test credit card numbers or payment methods provided for testing. Keep in mind, real credit card details won’t work during this process, and transactions may fail if the gateway isn’t configured properly.
How can I test refunds and manual payment capture safely?
To safely test refunds and manual payment capture in Shopify, you can use the test mode feature for your payment gateway. This allows you to simulate transactions without any actual charges.
When testing refunds, start by processing a test order. Once the order is complete, cancel it and issue a refund. For manual payment capture, create a test order using test credit card details, then manually capture the payment.
Remember to disable test mode once you're done testing. This ensures that real transactions will process correctly moving forward.